Beauty Tips FREE Professional Courses
Achieve Elegant Nail Art with Simple Tools and Techniques
Easy nail art has become a popular trend in recent years, and it’s easy to see why. With endless possibilities for creativity and self-expression, nail art allows individuals to personalise their look in a fun and exciting way.
Let’s explore the beauty of nail art through the use of simple tools, techniques, and inspiration from a popular YouTube tutorial. Let’s dive into the world of nail art, and learn how to achieve stunning designs with just a few basic items.
“In the world of nail art, there are no limits to what you can create.” – Beauty Tips Team..
Beauty Tips FREE Professional CoursesCourses in beauty therapy, hypnosis, counselling, personal training, nutrition and more all professionally recognised and accredited Click HERE to check out our free trial...
Essential Tools for Nail Art
To begin your journey in nail art, it is crucial to gather the necessary tools that will help you achieve stunning designs. These simple items can be found in most homes and are easily accessible. Here are the key tools you will need:
1. Nail polish (base colour, topcoat, and additional colours for designs)
2. Nail polish remover
3. Cotton wipes
4. Toothpick or safety pin
5. Small brush or hairpin
“Creativity is allowing yourself to make mistakes. Art is knowing which ones to keep.” – Scott Adams

Step-by-Step Guide to Elegant Nail Art
Now that you have your tools, it’s time to follow a step-by-step guide to creating stunning nail art. Inspired by a popular YouTube tutorial, this guide will help you create a beautiful design using simple techniques.
1. Clean your nails: Before applying any nail polish, ensure that your nails are clean and free of any debris. This will help the polish adhere better and create a smooth canvas for your design.
2. Apply a base coat: Use a base coat of white nail polish as this will help the colours in your design stand out. Apply two coats for a more opaque finish.
“Nails are the period at the end of the sentence. They complete the look.”- Prabal Gurung
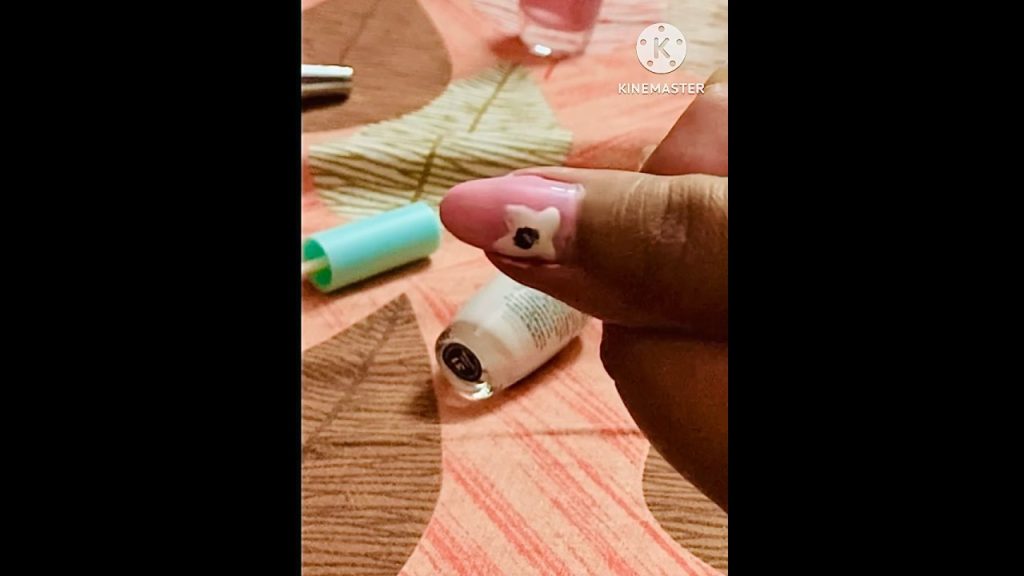
3. Create the design: Using a toothpick or safety pin, dip it into the black nail polish and create small dots on your nails. Arrange these dots in a pattern that will form the basis of your design.
4. Add details: Use a hairpin or small brush to create more intricate details within your design. This can include lines, swirls, and other shapes.
5. Apply a topcoat: Once your design is complete, apply a clear topcoat to seal your artwork and protect it from chipping or fading.
“I believe in manicures. I believe in overdressing. I believe in primping at leisure and wearing lipstick.” – Audrey Hepburn
Nail art is a creative and exciting way to express oneself through personal style. With simple tools and techniques, anyone can achieve stunning nail art designs that will make a statement. Remember, practice makes perfect, and with time, your nail art skills will continue to improve.
“Nail art does not need to be perfect. It just needs to be you.” – Beauty Tips
Utilize this comprehensive guide and the inspiration from a popular YouTube tutorial to begin your nail art journey. As you experiment with different designs, techniques, and tools, you’ll soon discover that the possibilities for self-expression through nail art are truly endless.
Tips and Tricks for Easy Nail Art Success
Now that you have a selection of easy nail art designs to try, here are some tips and tricks to ensure you achieve the best results:
- Practice makes perfect: Don’t be discouraged if your first attempt at easy nail art doesn’t turn out as you envisioned. With practice, you will improve your technique and gain confidence in your abilities.
- Invest in the right tools: While many easy nail art designs can be achieved with household items, investing in specialised nail art tools can make the process easier and more enjoyable.
- Choose quality nail polish: The quality of your nail polish can greatly impact the outcome of your easy nail art designs. Opt for reputable brands that offer smooth application and long-lasting wear.
- Take your time: Rushing through your easy nail art designs can lead to smudges, uneven lines, and other imperfections. Set aside ample time to complete your designs and allow each layer to dry properly.
- Experiment with your own style: The beauty of easy nail art is that it can be completely customised to suit your personal style and preferences. Don’t be afraid to mix and match colours, patterns, and techniques to create your own unique designs.
Easy Nail Art Design #1: Classic Polka Dots
Polka dots are a timeless pattern that can instantly add a touch of playfulness and charm to your nails. This easy nail art design is perfect for beginners and can be customized in countless ways with different color combinations and dot sizes.
Materials:
- Base coat
- Two contrasting nail polish colors
- Top coat
- Dotting tool or toothpick
Instructions:
- Apply a base coat to protect your nails and ensure a smooth surface for the polish.
- Paint your nails with your chosen base color, allowing it to dry completely.
- Dip your dotting tool or toothpick into the second polish color and gently press it onto your nail to create a dot. Repeat until you have an evenly spaced pattern of dots across your nail.
- Allow the dots to dry before applying a top coat to seal and protect your easy nail art design.
Easy Nail Art Design #2: Gradient Ombre
The gradient ombre is an easy nail art technique that creates a smooth transition between two or more colors. This design is perfect for those who want to experiment with colour blending and achieve a professional-looking result.
Materials:
- Base coat
- Two or more nail polish colours
- Makeup sponge
- Top coat
Instructions:
- Apply a base coat to protect your nails and ensure a smooth surface for the polish.
- Choose two or more nail polish colors that will blend well together. Apply a stripe of each color onto the makeup sponge, slightly overlapping them.
- Press the sponge onto your nail, dabbing gently to transfer the polish and create a gradient effect. Repeat this process until you achieve the desired colour intensity and blend.
- Allow your nails to dry before applying a top coat to seal and protect your easy nail art design.
Easy Nail Art Design #3: Stripes and Lines
Stripes and lines are versatile and easy nail art designs that can be adapted to suit any style or occasion. Whether you prefer bold, geometric patterns or delicate, intricate designs, this technique is perfect for beginners looking to make a statement with their nails.
Materials:
- Base coat
- Two or more nail polish colours
- Striping tape or thin brush, or pin
- Top coat
Instructions:
- Apply a base coat to protect your nails and ensure a smooth surface for the polish.
- Paint your nails with your chosen base colour, allowing it to dry completely.
- Apply striping tape or use a thin brush dipped in your second polish colour to create your desired pattern of stripes or lines. Allow the design to dry before carefully removing the tape or touching up any mistakes with a small brush and polish remover.
- Apply a top coat to seal and protect your easy nail art design.
Easy Nail Art Design #4: Stamped Patterns
Stamping is an easy nail art technique that allows you to transfer intricate designs onto your nails with minimal effort. This method is perfect for beginners who want to create detailed patterns without the need for steady hands or artistic skills.
Materials:
- Base coat
- Nail polish for stamping
- Stamping plate with your desired design
- Scraper or old credit card
- Silicone stamper
- Top coat
Instructions:
- Apply a base coat to protect your nails and ensure a smooth surface for the polish.
- Paint your nails with your chosen base colour and allow it to dry completely.
- Apply a generous amount of stamping polish onto your desired design on the stamping plate.
- Use the scraper or old credit card to remove excess polish, leaving only the design filled with polish.
- Press the silicone stamper onto the design, transferring the polish onto the stamper.
- Align the stamper with your nail and gently press down, rolling the stamper from one side to the other to transfer the design onto your nail.
- Allow the design to dry before applying a top coat to seal and protect your easy nail art.
Easy Nail Art Design #5: Marbled Swirls
Marbled swirls are an eye-catching and easy nail art technique that can be achieved using a variety of methods, such as water marbling or dry marbling. In this article, we will focus on the dry marbling technique, which is easier for beginners to master.
Materials:
- Base coat
- Two or more nail polish colours
- Toothpick or small dotting tool
- Top coat
Instructions:
- Apply a base coat to protect your nails and ensure a smooth surface for the polish.
- Paint your nails with your chosen base colour, allowing it to dry slightly but not completely.
- Apply small dots of your second polish colour onto the base colour while it is still tacky. You can either create a random pattern or a more organised design, depending on your preference.
- Use a toothpick or small dotting tool to gently swirl the colours together, creating a marbled effect. Be careful not to over-mix the colors, as this can result in a muddy appearance.
- Allow your nails to dry completely before applying a top coat to seal and protect your easy nail art design.
#viral #2023 #trending #nailart #nails
Beauty Tips FREE Professional Courses
